
Solar prep on an RV means the RV includes pre-installed wiring, roof ports, or a sidewall plug that simplifies solar panel installation. Solar prep does not include solar panels. This setup creates a plug-and-play connection that links solar panels and a charge controller directly to the RV battery bank without extensive rewiring.
What Does Solar Prep Really Mean on an RV?
The Basic Definition of Solar Prep
The reality behind solar prep is simpler than you’d expect. In most cases, a solar-prepped RV is just an RV that has a wire run from the battery to an external port on the roof or sidewall. That’s the extent of what most manufacturers consider “solar ready.” Different manufacturers use the solar ready label differently, and there’s not really an industry standard.
Some manufacturers go through the trouble of creating a plug-and-play solar setup complete with all the major components. However, these are the exception rather than the rule. The main takeaway here is that your solar ready sticker is more for marketing than for actually indicating what’s included.
What Solar Ready Actually Includes
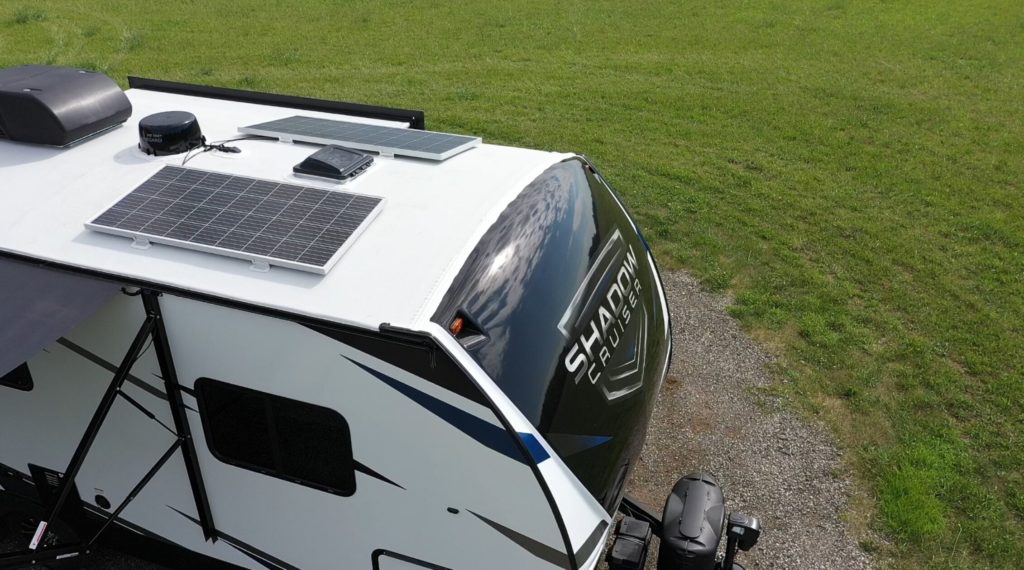
Running the wiring is usually the most complicated part, so it can be a great benefit to have this done for you. Wiring run to a rooftop port is ideal for permanently mounted solar panels, while wiring run to a side port is usually best for portable solar panels.
The quality of the wiring varies significantly between manufacturers. Some manufacturers take care to use thicker-gage wiring, while others use thinner wiring that limits the amount of power the system can handle. You’ll want to ask about the gage of the wiring used, as under-sized wiring can result in inadequate power which could make the setup useless for a larger solar array.
RVs with full wiring include a compatible inverter and charge controller that allows you to pull energy directly from your solar panels to use with different RV appliances. RVs that are only wired from the ports to the battery will be capable of trickle charging only.
What’s NOT Included in Solar Prep
A functioning solar setup consists of several components: solar panels, a charge controller (prevents overcharging and regulates power output for a consistent charge), a sufficient battery bank (your solar panels charge your batteries, and your batteries run your appliances), and wiring to connect all the components together.
Most RV manufacturers run a wire between the battery and an external port and call it a day. This means you’ll still need solar panels, a charge controller, and potentially a bigger battery bank. All the solar panels in the world won’t do any good if your battery bank can’t handle the load.
Common Misconceptions About Solar Ready RVs
Your RV Has Complete Solar Power
Solar ready stickers create several false expectations among RV buyers. Your solar ready RV likely will not come with any solar panels, nor will it include a solar charge controller, a key component of any solar system to ensure the appropriate amount of charge is hitting your batteries. Not much, to be honest.
The new RV you’ve had your eye on comes with a sticker advertising that it is ready to connect to a solar panel. What this means is that a solar panel company paid for their proprietary solar panel plug to be installed during the manufacturing process.
Solar ready is mostly a marketing tactic. If you want to get off grid and out of RV parks, what the manufacturer included isn’t going to be enough.
All Solar Prep is Created Equal
In practice, the type of port, wiring, and capacity of your solar ready setup can vary quite a bit. Some manufacturers care a lot more about the quality of their solar wiring than others.
Some go so far as to complete the job to a standard that basically allows you to plug-and-play with compatible solar panels. Others seem to only care about doing enough to be able to advertise that their rigs are solar ready.
For example, Keystone’s SolarFlex Ready includes a 30A solar roof port with MC4 connectors and a 10 AWG MPPT solar charging circuit, plus inverted 110v loop prep with up to 7 outlets (inverter not included).
Meanwhile, other manufacturers’ solar prep package is often nothing more than just the running of the wires from the roof to the bay and a weatherproof cover on the roof.
Myth: You Must Use Specific Brand Equipment
In many cases, RV manufacturers will partner with a specific company to install their proprietary solar port. This means when you’re ready to purchase a panel, you’re nudged toward that company’s offerings exclusively.
If you read the fine print on that shiny solar ready sticker, you are likely to find a strongly-worded warning message that cautions you to use the plug only if you buy and install that same company’s solar panels.
Absolutely not. There are many ways to connect solar panels to your RV or trailer using both portable or more permanent roof-top mounted panels. You can either bypass the previously installed plug or make it work with the panels you do want to use.
Understanding the Marketing Behind ‘Solar Ready’
Solar tech companies would obviously prefer you to buy their solar panels over the competitors’. So to try and force your hand, they pay to have their own proprietary plug installed on solar ports, then they add a big sticker warning you to only use THEIR solar panels.
Zamp, one of the big brands you’ll often see on newer RVs, is known for reversing the polarity on their RV SAE solar ports. If you plug a standard panel into one of these ports, at best it won’t work at all, and at worst it will damage your system.
Officially, Zamp does this for safety reasons, but it just so happens that Zamp makes companion panels designed to work with their proprietary plugs. The good news is that buying a solar ready RV with a port from a certain solar company doesn’t lock you into using their solar equipment to complete your solar installation.
Different Types of Solar Prep Configurations
Three-Port Roof Cap Setup
RVs equipped with a three-port roof cap come ready for expansion. The low-profile UV-resistant cap includes terminal block wiring, an all-weather mounting gasket, and stainless steel screws. This configuration works well if you’re pre-wired for roof-mounted panels and plan to add multiple solar panels over time.
Single-Port Roof Cap Setup
A single-port setup measures approximately 3-1/2″ x 2-3/8″ x 2-1/4″ and includes the same terminal block wiring and weather-resistant components. This basic configuration suits RVers who want one roof-mounted panel without plans for expansion.
Side-Mounted Wall Port Configuration
Side-mounted ports connect directly to your battery and are designed specifically for portable solar kits. According to manufacturer specifications, these ports allow you to plug in any portable solar kit with a controller to charge your batteries. Some manufacturers, such as Jayco, offer both sidewall and roof-mounted prep kits in their towable units.
Full Wiring vs Basic Wiring Systems
The distinction between full and basic wiring matters more than the port type. Basic systems run wire from the port to the battery only. Full wiring systems include connections for charge controllers and inverters, allowing you to pull energy directly from panels to run appliances rather than just trickle charge your batteries.
What You Actually Need to Complete Your Solar Setup
Essential Components Missing from Solar Prep
A complete solar system requires solar panels, charge controller, inverter, batteries, wiring, fuses, and safety disconnects. Your solar prep wiring handles one part of this equation. You’ll need to add panels, ensure your charge controller matches your panel configuration, and verify your battery bank has sufficient capacity for your energy needs.
Choosing Between Roof-Mounted and Portable Panels
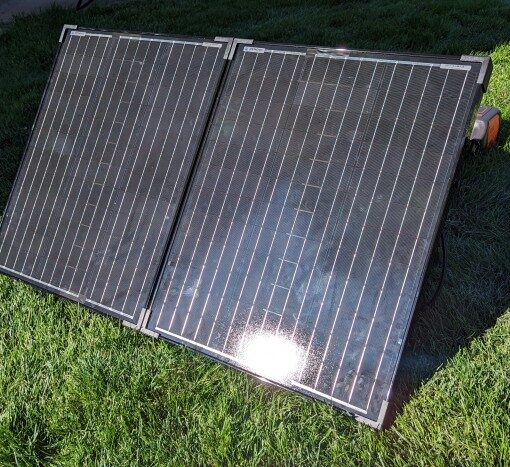
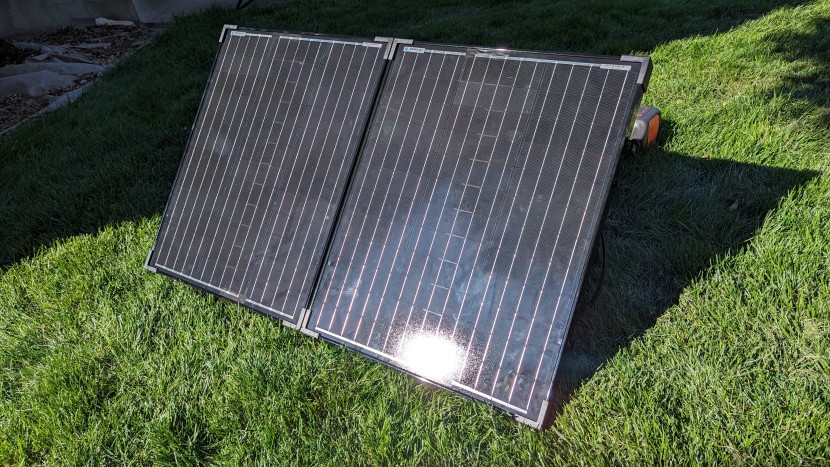
Portable panels offer flexibility in placement and can produce approximately 150% more power from the same wattage compared to horizontal roof-mounted panels. You can park in shade while positioning panels in direct sunlight. Roof-mounted systems eliminate daily setup and resist theft more effectively. Portable systems require storage space and repeated handling.
Can You Install Solar Panels Yourself?
DIY installation saves hundreds of dollars in labor costs. However, RV electrical systems differ significantly from home systems. You’ll need to drill through the roof, route wires through walls, and seal penetrations properly. Mistakes can cause electrical fires or void warranties.
When to Hire a Professional
Professional installers handle complex electrical integration and identify potential issues before they become problems. Labor costs comprise one-third to one-half of overall costs depending on your build. Many installers offer warranties on their work.
Conclusion
Solar prep sounds impressive, but as I’ve shown you, it’s mostly a marketing term for basic wiring. Your “solar ready” RV still needs panels, a charge controller, and likely battery upgrades to function off-grid.
The good news? You’re not locked into any specific brand, despite what those warning stickers suggest. Use what you’ve learned here to assess your RV’s actual solar capabilities and budget accordingly for the components you’ll actually need.
